overview
This time we will build a WordPress server for free using Oracle Cloud.
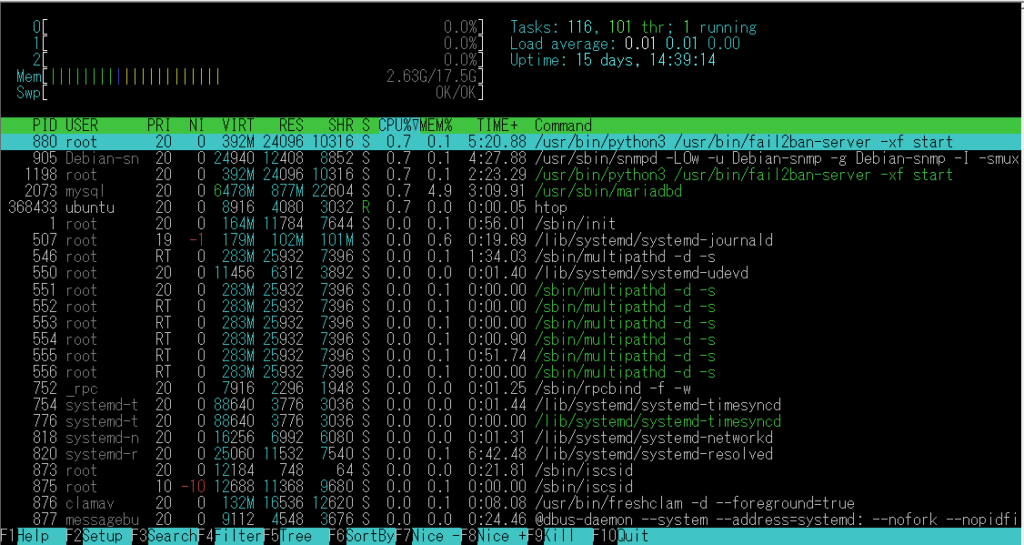
Oracle Cloud’s Arm can create instances up to 4 CPUs and 24 GB for free, so I would like to use this to create it. It’s free, but frankly, it creates a very comfortable environment.
This blog server is actually built with 3 CPUs and 18 GB. too much over spec.・・・(;´∀`)
Let’s get started.
create an instance(OracleCloud)
- Create an account in Oracle Cloud in advance.
We will post a URL that will be helpful for creating an OracleCloud account.
https://zenn.dev/tetsu_koba/articles/ffda32a38f22aa
- After entering the Oracle Cloud console, Select Computer→Instances, and proceed to the Create compute instance screen.
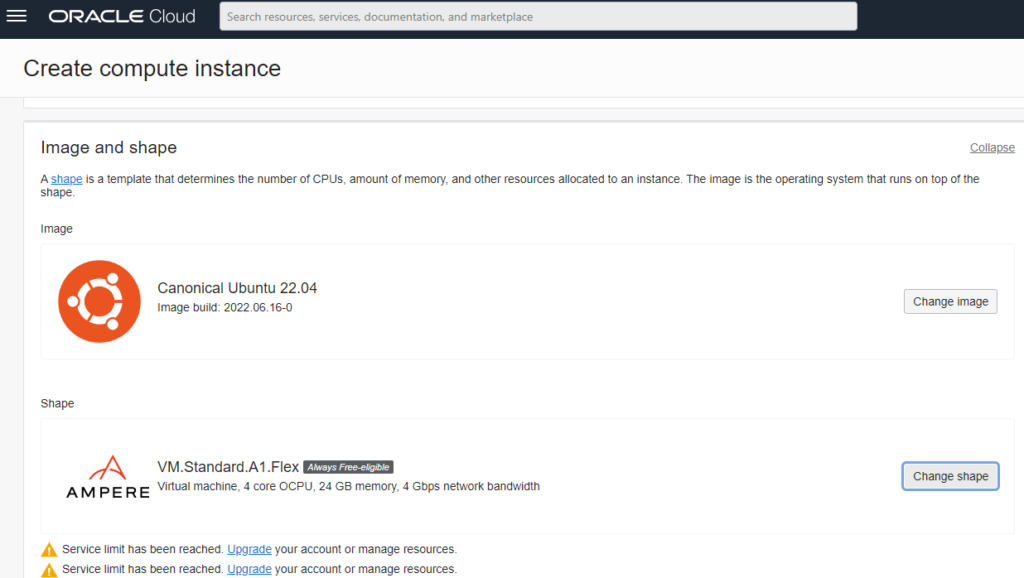
Image:Canonical Ubuntu 22.04
Shape:A1.Flex 3core, 18GB
—
1 core for core and 4GB for memory is enough for operation.

Also cpu and memory can be changed later.

* Save the private key and public key.

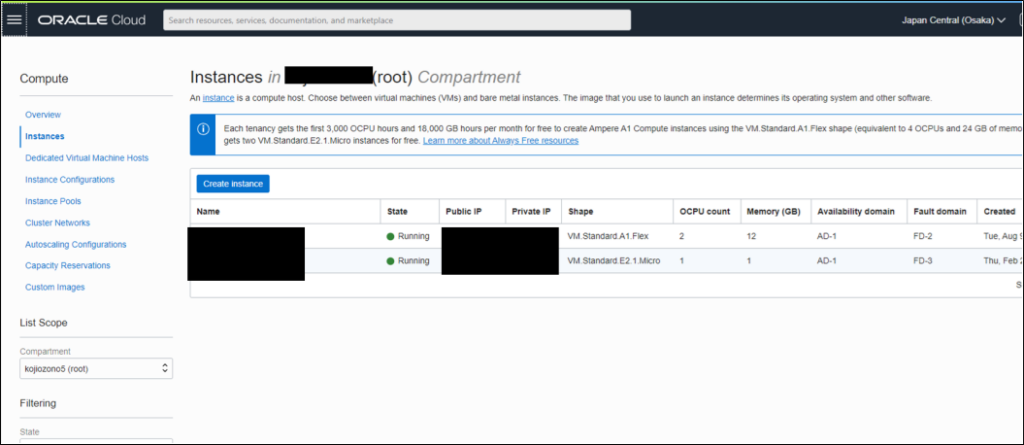
Once created, the created instance will be displayed in Instances.

Make a note of the PublicIP that is displayed.
change hostname, update packag
①Connect with SSH
ssh ubuntu@xxx.xxx.xxx.xxx -i xxxx.key※xxx.xxx.xxx.xxx is the Public IP
※xxxx.key is the file name of the private key
②Change hostname.
sudo vim /etc/hostname③change hosts.
sudo /etc/hosts④Install updates and curl, wget, unzip.
sudo apt update
sudo apt upgrade
sudo apt install curl git wget unzip -y
Nginx install
①nginx install
sudo apt install nginx②80(HTTP), 443(HTTPS) port open
sudo vim /etc/iptables/rules.v4Add the following: The place to add is under the description of 22 (SSH).
-A INPUT -p tcp -m state --state NEW -m tcp --dport 443 -j ACCEPT
-A INPUT -p tcp -m state --state NEW -m tcp --dport 80 -j ACCEPT
Apply the modified rule.
sudo iptables-restore < /etc/iptables/rules.v4http://PublicIP
and confirm that the nginx default page is displayed.
domain settings(Mydns)
Please register an account with MyDNS.JP and acquire a domain.
I will post a URL that may be helpful.
https://zenn.dev/hatotk/articles/set-domain-to-use-with-mydns-jp
http://domain
and confirm that the nginx default page is displayed.
Https(Lets’Encript)
Plaintext is dangerous because it does not encrypt what you enter in the form.
Make it HTTPS.
(1) Install certbot
sudo apt install certbot python3-certbot-nginx(2) Run certbot
sudo certbotYou will be asked for your e-mail address, etc. as shown below, so enter it.
Saving debug log to /var/log/letsencrypt/letsencrypt.log
Enter email address (used for urgent renewal and security notices)
 (Enter 'c' to cancel): Enter your email address

- - - - - - - - - - - - - - - - - - - - - - - - - - - - - - - - - - - - - - - -
Please read the Terms of Service at
You must agree in order to register with the ACME server. Do you agree?
- - - - - - - - - - - - - - - - - - - - - - - - - - - - - - - - - - - - - - - -
(Y)es/(N)o: Y

- - - - - - - - - - - - - - - - - - - - - - - - - - - - - - - - - - - - - - - -
Would you be willing, once your first certificate is successfully issued, to
share your email address with the Electronic Frontier Foundation, a founding
partner of the Let's Encrypt project and the non-profit organization that
develops Certbot? We'd like to send you email about our work encrypting the web,
EFF news, campaigns, and ways to support digital freedom.
- - - - - - - - - - - - - - - - - - - - - - - - - - - - - - - - - - - - - - - -
(Y)es/(N)o: N
Account registered.
③
(3) After successfully completing this step, access the https://domain and confirm that the nginx default page is displayed.
MariaDB install
① Install the DB (MariaDB) required for WordPress.
sudo apt install -y mariadb-server mariadb-client
sudo systemctl start mariadb
sudo systemctl enable mariadb
② Create DB and DB user for WordPress
sudo mysql -u root -p

MariaDB [(none)]> CREATE DATABASE wordpress;
MariaDB [(none)]> CREATE USER 'wordpress' IDENTIFIED BY 'password';
GRANT ALL ON wordpress.* TO 'wordpress' WITH GRANT OPTION;
FLUSH PRIVILEGES;
EXIT- DATABASE:wordpress
- USER:wordpress
- PASSWORD:password
PHP install
Since the WordPress program is PHP, we will build a PHP execution environment.
①Install php related files
sudo apt install -y php-dom php-simplexml php-ssh2 php-xml php-xmlreader php-curl php-exif php-ftp php-gd php-iconv php-imagick php-json php-mbstring php-posix php-sockets php-tokenizer php-fpm php-mysql php-gmp php-intl php-cli②Modify PHP.ini
sudo vim /etc/php/*/fpm/php.iniupload_max_filesize = 100M←変更
memory_limit = 256M←変更
max_execution_time = 360 ←変更
date.timezone = Asia/Tokyo←変更③php service restart
sudo systemctl restart php*-fpm.service④Enable PHP in your Nginx configuration file.
sudo vim /etc/nginx/sites-available/defaultserver {
listen 80 default_server;
listen [::]:80 default_server;
root /var/www/html;
index index.html index.htm index.nginx-debian.html;
server_name _;
location / {
try_files $uri $uri/ =404;
}
}
server {
server_name techlog.mydns.jp; # managed by Certbot
root /var/www/html/wordpress;
index index.php index.html index.htm;
access_log /var/log/nginx/wpress_access.log;
error_log /var/log/nginx/wpress_error.log;
client_max_body_size 100M;
location ~ .php$ {
include snippets/fastcgi-php.conf;
fastcgi_pass unix:/var/run/php/php-fpm.sock;
fastcgi_param SCRIPT_FILENAME $document_root$fastcgi_script_name;
include fastcgi_params;
}
listen [::]:443 ssl ipv6only=on; # managed by Certbot
listen 443 ssl; # managed by Certbot
ssl_certificate /etc/letsencrypt/live/techlog.mydns.jp/fullchain.pem; # managed by Certbot
ssl_certificate_key /etc/letsencrypt/live/techlog.mydns.jp/privkey.pem; # managed by Certbot
include /etc/letsencrypt/options-ssl-nginx.conf; # managed by Certbot
ssl_dhparam /etc/letsencrypt/ssl-dhparams.pem; # managed by Certbot
}
server {
if ($host = techlog.mydns.jp) {
return 301 https://$host$request_uri;
} # managed by Certbot
listen 80 ;
listen [::]:80 ;
server_name techlog.mydns.jp;
return 404; # managed by Certbot
}
↑↑↑↑
of the server directive that describes the added domain
- root, index, access_log, error_log, client_max_body_size, location
change the part of
WordPress install
Get the wordpress module and extract it.
cd /var/www/html
sudo wget https://ja.wordpress.org/latest-ja.zip
sudo unzip latest-ja.zip
sudo chown -R www-data:www-data /var/www/html/wordpress/
sudo chmod -R 755 /var/www/html/wordpress/
Specify the database name, username and password and click Submit.
- DATABASE:wordpress
- USER:wordpress
- PASSWORD:password

Click Run Install.

Enter the required information.

ログインをクリックします。

That is all. Thank you for your hard work.
